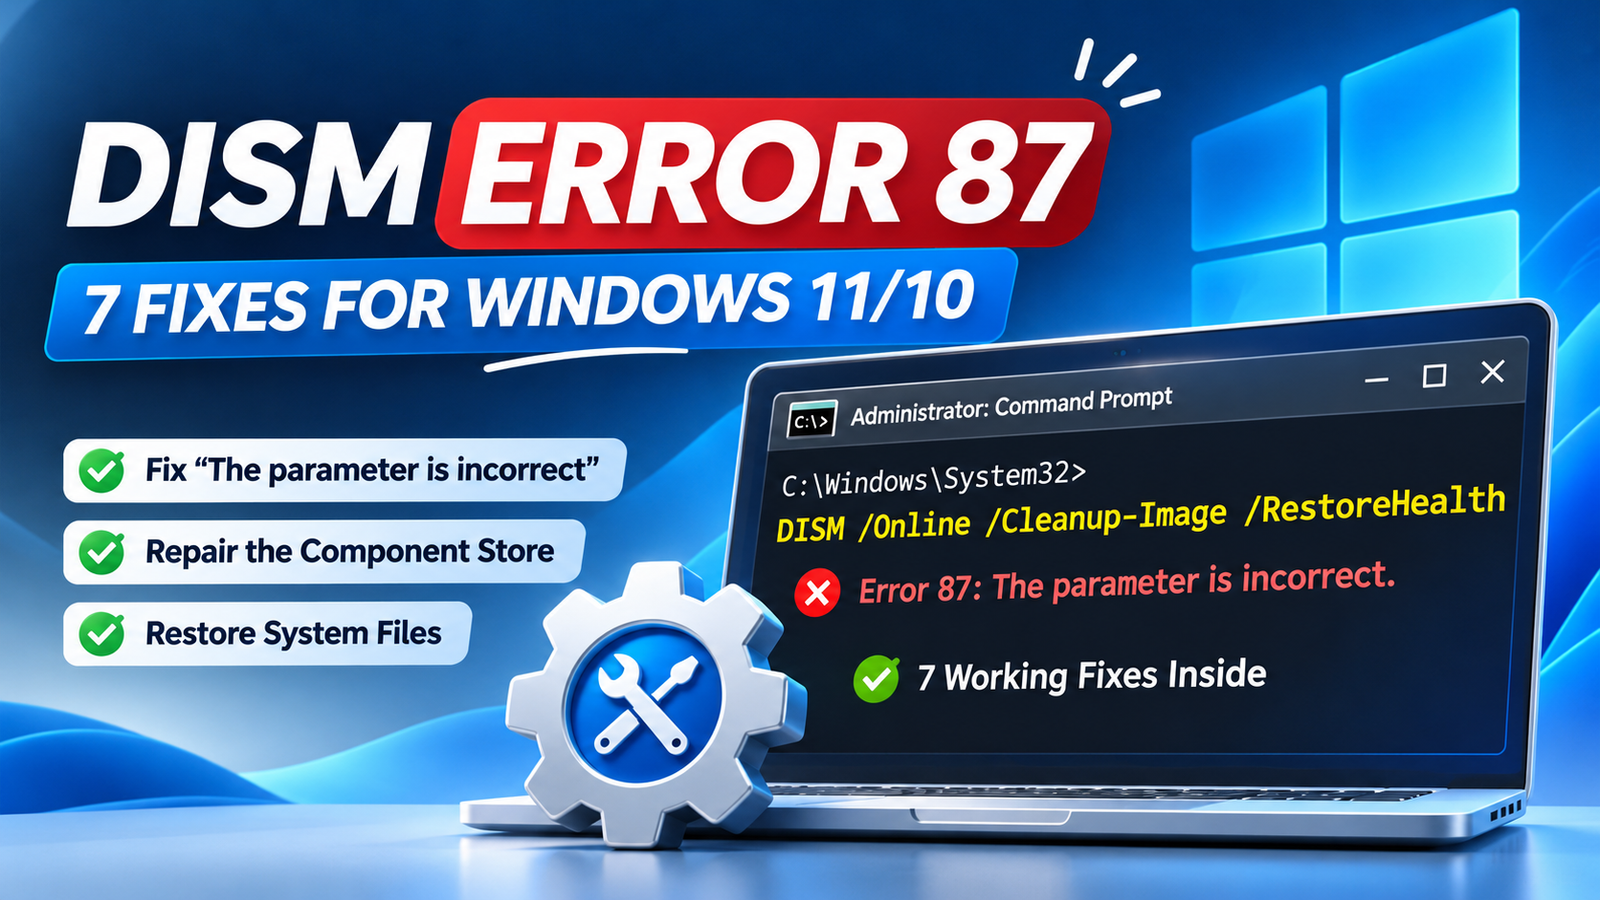
DISM Error 87: 7 Powerful Fixes for Windows 11/10

DISM error 87 is usually encountered when the Windows blocks a Deployment Image Servicing and Management (DISM) command. The most common cause is incorrect command syntax, such as a misspelled parameter or a missing space before a switch. If the error occurs immediately, check the command before assuming that Windows is broken.
Start with an elevated Command Prompt and test this exact command: DISM.exe /Online /Cleanup-Image /RestoreHealth. This guide shows how to isolate the cause of DISM Error 87 in Windows 11 and Windows 10, apply seven practical fixes, and verify the result before escalating to a repair installation.
On This Page
Quick answer: How to fix DISM Error 87
In many cases, DISM Error 87 is a parameter or command-line syntax problem rather than proof of a corrupted Windows installation. Open Command Prompt or Windows Terminal as administrator, copy the command exactly, and keep a space before every slash-prefixed option. If the syntax is correct but the error remains, check your Windows build, servicing state, and repair source before attempting an ISO-based repair.
What DISM Error 87 means
DISM is a built-in Windows servicing utility. It checks and repairs the component store, which contains files Windows uses to service the operating system and restore protected system components. DISM Error 87 means that the tool could not understand one or more parameters supplied to it. You may see “Error: 87” or “The parameter is incorrect.”
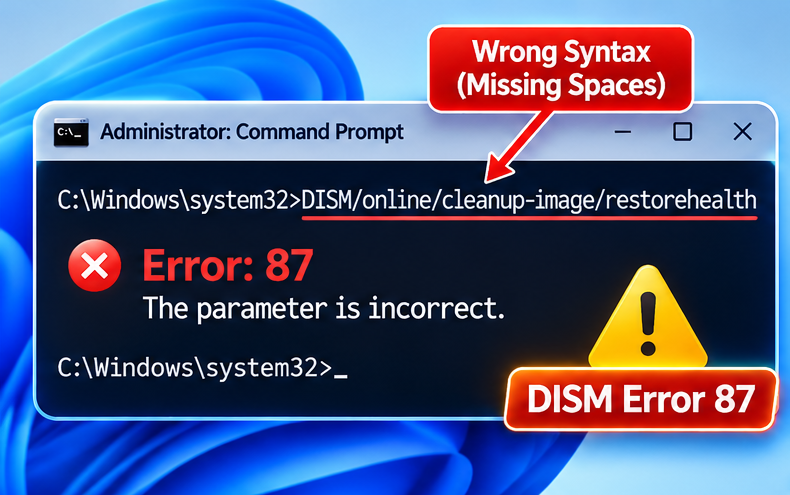
The timing of the failure is an important diagnostic clue. If the message appears immediately, inspect the command, terminal permissions, and whether the selected option is supported. If the scan runs for a while and then stops, investigate the repair source, Windows Update, or component-store health. Do not treat every instance of DISM Error 87 as the same fault.
Common root causes
- Syntax mistake: A missing space, misspelled switch, misplaced colon, or copied character makes the command invalid.
- Non-elevated terminal: The terminal was opened without administrator privileges required for servicing.
- Unsupported option or environment: A parameter may not apply to the Windows version or image being serviced.
- Repair-source mismatch: The ISO, image index, edition, or file type does not match the installed Windows image.
- Servicing or component-store issue: More likely when a correctly formed scan begins and then reports a separate corruption or source error.
For other Windows maintenance symptoms, our guide to identifying an unfamiliar RTR temporary file in Windows 11 explains how to investigate files before deleting them.
Diagnostic checklist: Three checks before changing anything
- Confirm the Windows version. Press Win + R, enter
winver, and note the edition, version, and OS build. - Check the command carefully. Use the exact syntax in this guide, including spaces and hyphens. Avoid commands copied from unrelated forum posts or older Windows tutorials.
- Identify when the error occurs. An immediate DISM Error 87 points first to syntax or parameter support. A failure after progress has started calls for checking the repair source or servicing logs.
Screenshot to add: The Windows winver dialog showing the installed edition, version, and OS build.
7 proven fixes for DISM Error 87 in Windows 11 and Windows 10
Fix 1: Open Command Prompt or PowerShell as administrator
Why it works: System-image servicing requires an elevated terminal. Signing in with an administrator account does not automatically elevate every Command Prompt window. If the terminal was opened normally, DISM Error 87 or a permissions-related failure may appear before the repair can proceed.
- Open Start and type Command Prompt.
- Right-click the result and select Run as administrator.
- Approve the User Account Control prompt.
- Enter the standard repair command:
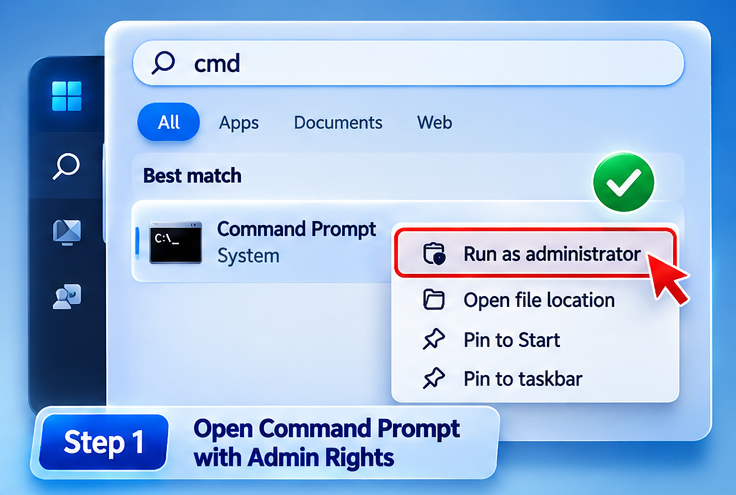
DISM.exe /Online /Cleanup-Image /RestoreHealthPowerShell or Windows Terminal can also be opened with Run as administrator. Check that the window is elevated before running the command.
Verify: DISM should begin checking the online Windows image. A successful run reports that the restore operation completed successfully. That confirms this repair operation finished; it does not prove that every unrelated Windows problem is resolved.
Fix 2: Correct the DISM command syntax
Why it works: DISM parses each switch as a separate argument. A missing separator or misspelled option is similar to feeding a malformed signal into a circuit input: the tool cannot interpret the request. This is one of the first things to test when DISM Error 87 appears instantly.
Copy the command below rather than retyping it from memory. There must be a space before /Online, /Cleanup-Image, and /RestoreHealth. Also check that Cleanup-Image contains a hyphen.
DISM.exe /Online /Cleanup-Image /RestoreHealth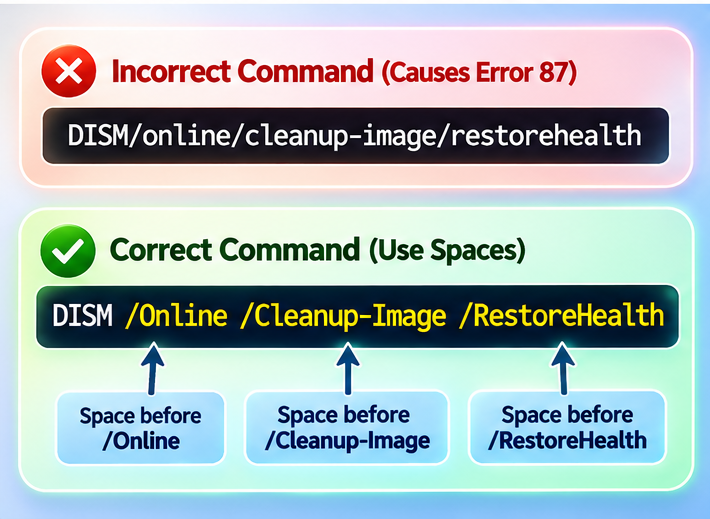
Do not join the switches together, remove spaces, or add punctuation at the end. Capitalisation is not normally the problem; spelling and separators are. For additional command-line checks and system housekeeping, see our practical guide to speeding up a slow Windows PC.
Verify: DISM should accept the options and begin processing. If DISM Error 87 remains, stop repeating the same command and move on to the Windows build and servicing checks.
Screenshot to add: A side-by-side view of the correctly spaced command and a deliberately malformed example, with the incorrect character highlighted.
Fix 3: Run SFC to check protected system files
Why it works: System File Checker (SFC) checks protected Windows system files and attempts to replace incorrect versions using cached copies. It works at a different layer from DISM, so its result helps narrow down the fault.
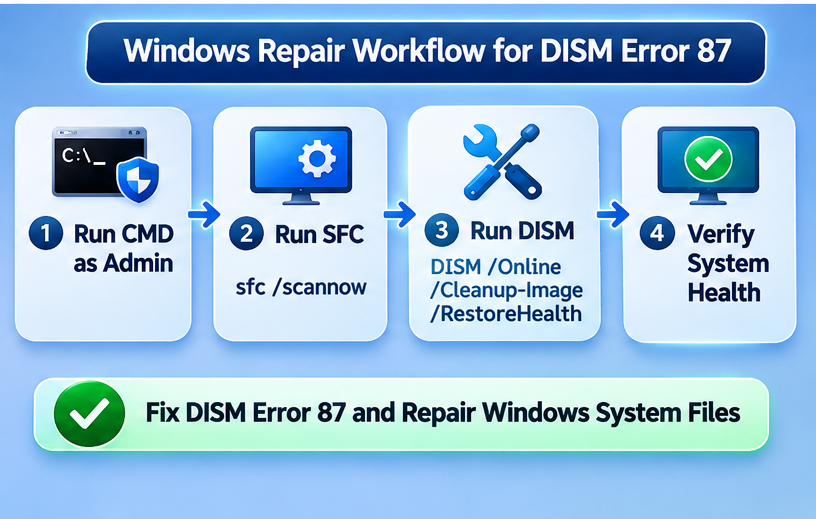
Important order note: Microsoft’s usual guidance for repairing Windows corruption is to run DISM first and then SFC, because DISM can repair the component store that SFC relies on. Use this SFC check as a diagnostic step when investigating a particular issue, not as a universal replacement for DISM.
- Open Command Prompt as administrator.
- Enter the command below and wait for verification to reach 100%.
- Read the final message before restarting.
sfc /scannowVerify: SFC may report that it found no integrity violations, repaired corrupted files, or found files it could not repair. If files are repaired, restart Windows and run SFC again. If it cannot repair files, return to the DISM repair path and investigate the component store. Microsoft’s System File Checker instructions explain how to interpret the scan results.
Screenshot to add: SFC reaching 100% and displaying its final result.
Fix 4: Install pending Windows updates
Why it works: Updates can deliver servicing improvements and refreshed system components. This is worth checking when the command syntax is correct but DISM Error 87 in Windows 11 or Windows 10 continues on an older or partially updated installation.
- Save open work and connect the PC to power.
- Open Settings → Windows Update.
- Select Check for updates.
- Install applicable updates and restart when prompted.
- Retry the standard DISM command from an elevated terminal.
DISM.exe /Online /Cleanup-Image /RestoreHealthVerify: Windows Update should report that available updates are installed or that the device is up to date. If DISM Error 87 persists, note the OS build from winver and continue to the PowerShell alternative.
Screenshot to add: Windows Update showing the update status after the restart.
Fix 5: Use the PowerShell Repair-WindowsImage alternative
Why it works: Windows includes a DISM PowerShell module. The Repair-WindowsImage cmdlet provides another supported interface for servicing an online image. It can help distinguish a Command Prompt entry or syntax issue from a broader servicing problem.
- Right-click Start and select Terminal (Admin) or open Windows PowerShell (Admin).
- Enter the command below.
- Wait for the cmdlet to finish and review the output.
Repair-WindowsImage -Online -RestoreHealthVerify: PowerShell should return the image repair result. If the cmdlet is not recognised, confirm that you are using Windows PowerShell with the DISM module available and that the session is elevated. This is an alternative interface, not a way to bypass an unsupported servicing operation. Microsoft documents the Repair-WindowsImage cmdlet and its parameters.
Fix 6: Use a matching Windows ISO as the repair source
Why it works: DISM normally obtains repair files through Windows Update. If those files cannot be found or downloaded, a compatible Windows installation image can provide a local source. A mismatched source can fail, so check the edition, language, architecture, release, and update level as closely as possible before using it to resolve DISM Error 87 or a related source-file error.
Before you start: Download installation media from Microsoft, mount the ISO by right-clicking it and selecting Mount, and open its sources folder. Do not use an ISO from an unknown download site. Check whether the folder contains install.wim or install.esd.
The following commands are for an install.wim file. Replace X: with the mounted ISO drive letter:
DISM /Get-WimInfo /WimFile:X:\sources\install.wimChoose the image index that matches the Windows edition installed on the PC. Then run the repair command, replacing X: and N with the correct drive letter and index:
DISM.exe /Online /Cleanup-Image /RestoreHealth /Source:WIM:X:\sources\install.wim:N /LimitAccess/LimitAccess tells DISM not to contact Windows Update for repair-source files. Use it here because you are deliberately specifying a local source. If the ISO contains install.esd, do not reuse the WIM command unchanged; the source prefix and file type must match the actual media.
Verify: DISM should complete the restore operation successfully. If it reports that source files could not be found, verify the drive letter, image index, file type, and ISO compatibility before repeating the command. Microsoft’s documentation on repairing a Windows image and configuring a Windows repair source explains the supported source options.
Screenshots to add: The mounted ISO’s sources folder showing install.wim, and the /Get-WimInfo output showing the available edition indexes.
If you need to create installation media, follow our walkthrough for creating a bootable USB drive before proceeding. Always confirm that the media matches the installed Windows edition.
Fix 7: Reset Windows Update components, then consider an in-place repair upgrade
Why it works: A damaged Windows Update download cache can prevent servicing files from being retrieved. If the component store or servicing environment remains unhealthy after the earlier checks, an in-place repair upgrade can reinstall Windows while keeping personal files and, when the option is available and selected, installed apps.
Before you start: These commands stop update-related services and rename cache folders. This changes system state. Back up important files first. Keep the PC connected to power. Before an in-place repair upgrade, create a restore point where available and make a separate backup of important data.
Open Command Prompt as administrator and run the commands below one at a time. If a service is not running, the stop command may report that; read the message before continuing.
net stop wuauserv
net stop bits
net stop cryptsvc
ren %systemroot%\SoftwareDistribution SoftwareDistribution.old
ren %systemroot%\System32\catroot2 catroot2.old
net start cryptsvc
net start bits
net start wuauserv
Restart Windows, open Windows Update, check for updates, and retry DISM. If a cache folder already has the suffix .old, do not overwrite it; choose another unused suffix or resolve the existing folder state first. Do not delete renamed folders until Windows Update works and you are confident they are no longer needed.
Last resort: in-place repair upgrade. Use official installation media that matches the installed Windows language and edition. From the running Windows desktop, open the mounted ISO and run setup.exe. Follow the prompts and select Keep personal files and apps if that option is offered. If it is unavailable, stop and check compatibility rather than proceeding with a clean installation by mistake.
Verify: Windows Update should complete a scan and the DISM command should run without DISM Error 87. After an in-place repair, check Windows activation, updates, drivers, apps, and personal files.
Quick fault-finding table
| Symptom | Likely cause | Fix to try |
|---|---|---|
| Error 87 appears immediately | Malformed command or unsupported parameter | Fix 1 and Fix 2 |
| “The parameter is incorrect” | Invalid syntax, argument, or source path | Check spaces, spelling, and paths |
| DISM cannot find source files | Wrong ISO, index, or image file type | Fix 6 |
| DISM cannot access repair files | Windows Update or servicing problem | Fix 4, then Fix 7 |
| SFC cannot repair some files | Component-store or protected-file corruption | Follow Microsoft’s DISM-then-SFC sequence |
| PowerShell cmdlet is not recognised | Wrong shell or unavailable DISM module | Use elevated Windows PowerShell or Command Prompt |
How to prevent DISM Error 87
- Copy commands from trusted Microsoft documentation instead of relying on memory.
- Open an elevated terminal before running servicing commands.
- Keep Windows updated and restart after servicing-related updates.
- Use installation media that matches the installed Windows edition, language, architecture, and release.
- Keep a current backup before major system repairs or an in-place upgrade.
Frequently asked questions
What does “The parameter is incorrect” mean in DISM?
It means DISM rejected an argument or parameter. Check the command spelling, spaces, option support, and any source path. The message alone does not prove that Windows is corrupted.
Is DISM safe to run?
The standard online health checks and /RestoreHealth command are built-in Windows servicing operations. They are intended to check and repair Windows, but they can take time and should not be interrupted unnecessarily. Back up important data before more involved repair operations.
What is the difference between DISM and SFC?
DISM repairs the Windows component store that is responsible for providing system repair files. SFC scans for corrupted protected system files in Windows and repairs them if possible. DISM is the first step in the normal repair sequence from Microsoft. Then run sfc /scannow.
Why is DISM stuck at 20% or 62%?
The progress display can remain at one percentage for a while during servicing. A pause at 20% or 62% does not automatically mean the process is frozen. Keep the PC powered on and give it time. Check CPU and disk activity, then inspect %windir%\Logs\DISM\dism.log if there is no progress for an extended period or the command returns an error.
Does DISM Error 87 happen on Windows 7?
The online repair switches used in this guide, including /Online /Cleanup-Image /RestoreHealth, are for supported modern Windows servicing environments and are not a Windows 7 repair recipe. Windows 7 has a different support and servicing context. Do not assume a Windows 10 or Windows 11 command applies to it.
Final Checks to Resolve DISM Error 87
When DISM Error 87 appears, start with the command itself. Confirm elevation, copy the standard syntax, and check the Windows build. Only move to SFC checks, update repair, or ISO-based recovery when the evidence points beyond a simple parameter problem.
After a successful DISM repair, run sfc /scannow as a final integrity check, restart if repairs were made, and repeat the check if needed. If the fault returns, preserve the exact error text and review %windir%\Logs\DISM\dism.log rather than running unrelated repair commands at random.